 how-to
How to Improve Concrete Drainage Around Your House
Table of Contents
- Diagnose Your Concrete Drainage Problem
- Correct Ground Slope and Grading Away from Foundation
- Concrete Slab Drainage Solutions for Patios and Sidewalks
- How to Redirect Water Away from Foundation with Drainage Systems
- Concrete Patio Drainage Problems and Channel Installation
- Repair or Replace Damaged Drainage Pipes
- Safe Excavation, Permits, and When to Call a Professional
- Verify Your Work and Maintain Drainage Long-Term
- Frequently Asked Questions
Last Updated: October 19, 2026
Diagnose Your Concrete Drainage Problem
Standing water around your concrete isn't just ugly, it's destroying your foundation. Water pooling next to your house seeps into the soil beneath your concrete, weakens the base, and causes cracking, settling, and expensive repairs.
Observe your property during or after heavy rain. Walk your driveway, patio, and foundation perimeter and note where water collects, marking low spots with chalk.
Identify where water pools and why
Water pools in specific locations for specific reasons. The most common culprits are:
- Low spots in the concrete, The slab settled unevenly or was poured without proper slope
- Blocked gutters or downspouts, Roof runoff isn't being directed away; it's falling straight down
- Poor grading, The ground around your house slopes toward the foundation instead of away from it
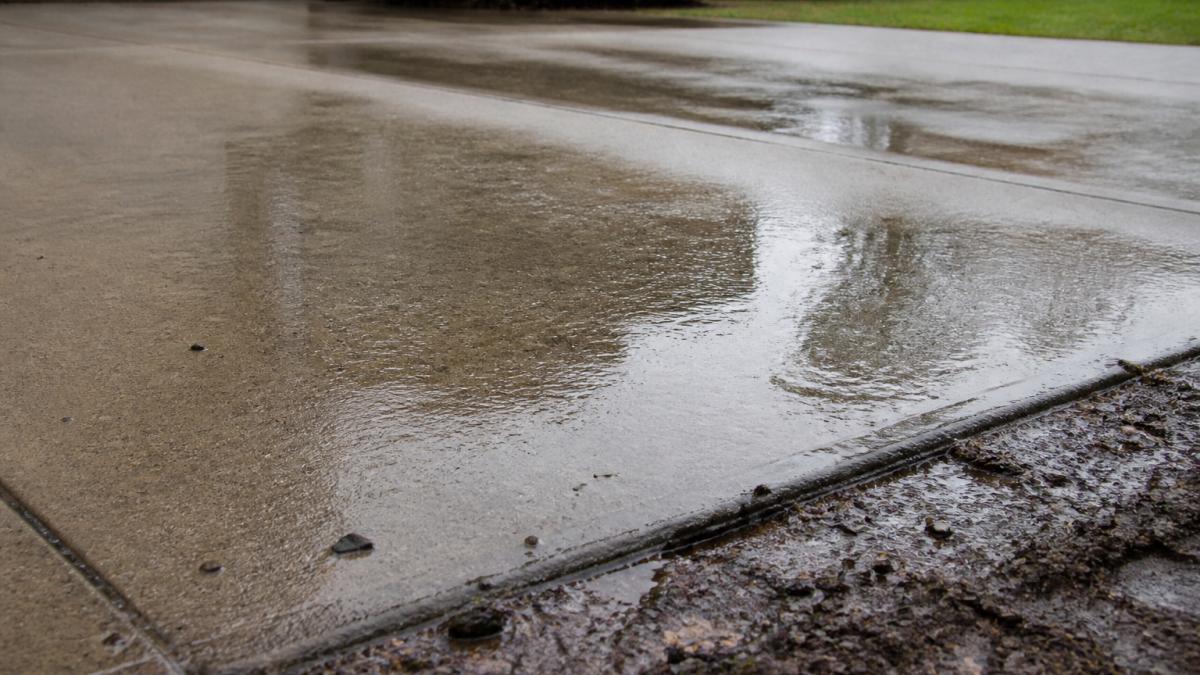
Once you've identified where water pools, trace its path: toward your house or away, and whether it collects near downspouts. That tells you whether the problem is roof runoff, poor grading, or a broken drainage system.
Measure ground slope and determine target fall
To measure slope, use a long level or string and tape:
- Place a level on the concrete, starting 1 foot from the foundation
- Lift the downhill end until the bubble centers
- Measure the vertical distance between the concrete at the house and the lifted end
- Divide that distance by the horizontal distance (in feet)
- Multiply by 12 to get inches per foot
For example: 2 inches over 20 feet is 1.2 inches per 10 feet, which is good. Less than 0.8 inches per 10 feet means your slope is too flat and water will pool.
If your measurements show flat or negative slope (sloping toward the house), you've found your problem. Correcting this is the most effective fix for concrete drainage around house problems.
Correct Ground Slope and Grading Away from Foundation
Fixing the grade is often the cheapest and most effective solution, reshaping the earth so water flows away from your house. The goal is a gentle, consistent slope that moves water at least 5 to 10 feet from your foundation:
Assess what you're working with. Dig a test hole 3 to 4 feet from your foundation. Clay holds water and compacts hard, sandy soil drains fast but erodes, and loamy soil is ideal, determining whether you need to add material or just reshape what's there.
Build up the grade near your foundation. Add topsoil or fill dirt to create height closest to the house, then slope it downward.
Compact as you go. Tamp every 2 inches of soil with a hand tamper or plate compactor, since loose soil settles and destroys your slope.
The key is consistency. Your slope doesn't have to be steep, but it has to be continuous, because water will find any flat spot and sit there.
Concrete Slab Drainage Solutions for Patios and Sidewalks
Patios and sidewalks are often poured without slope or with slope in the wrong direction.
Overlay the slab with new concrete. The most permanent fix is pouring a new layer on top, sloped away from your house.
Grind and slope the existing concrete. A contractor can grind the surface to create slope.
Use concrete sealant or resurface. Concrete resurfacer is a thin overlay (1/4 to 1/2 inch) troweled on to create slope.
How to Redirect Water Away from Foundation with Drainage Systems
When grading isn't enough or isn't practical, you need to actively redirect water with French drains, perforated pipe, and other subsurface systems.
Install a French drain or perforated drain tile
A French drain is a trench filled with gravel and perforated pipe. Water enters the gravel, flows into the pipe, and moves downhill to a discharge point, intercepting water before it reaches your foundation. Here's how to install one:
-
Dig a trench 12 to 18 inches deep, 12 inches wide, running along the area where water pools. Slope the trench slightly (1/4 inch per foot minimum) away from the house.
-
Line the trench with landscape fabric to prevent soil from clogging the drain.
-
Lay 4 inches of gravel at the bottom, use pea gravel or similar, not fines or dust.
-
Place perforated drain pipe (usually 4-inch PVC or corrugated pipe) on top of the gravel. Perforations face down to collect water from below.
-
Cover the pipe with 4 inches of gravel, then fold the landscape fabric over the top.
-
Add topsoil and sod or mulch to finish. The trench is now invisible but working.
The pipe should run to a daylight outlet, a downhill spot where water can exit and flow away. If none exists, connect it to a sump pump or dry well.
Use gravel-filled trenches to channel water
A gravel trench is simpler than a French drain but less effective long-term. Dig a trench 6 to 8 inches deep and 12 inches wide, fill it with pea gravel or crushed stone, and water percolates into the soil below. Over time soil washes in and clogs it, but it works for temporary or light drainage.
Gravel trenches are best used:
- Alongside a patio or sidewalk to catch runoff at the edge
- In areas with good drainage soil (sandy or loamy, not clay)
- As a temporary fix while you plan a permanent solution
Extend downspouts and manage roof runoff
Roof runoff is a major source of foundation water problems. A typical roof sheds thousands of gallons during a heavy rain, and standard downspouts end 4 to 6 inches above the ground, dumping water right next to your foundation. Move it at least 5 to 10 feet away.
Your options:
-
Extend downspouts with rigid or flexible pipe. Attach an extension along the ground or underground to a safe discharge point. Flexible extensions are cheaper but can kink; rigid ones look cleaner but cost more.
-
Bury downspout extensions. Bury PVC or corrugated pipe 12 inches deep, sloped downhill, to a daylight outlet or catch basin to keep water out of sight and prevent tripping.
-
Install a rain barrel or dry well. Capture roof runoff in a barrel for garden use, or direct it to a dry well where it infiltrates slowly away from your foundation.
-
Use a splash block. A concrete or plastic block at the outlet spreads water a few feet away. It's cheap but not a complete solution.
The best approach combines downspout extension with proper grading.
Concrete Patio Drainage Problems and Channel Installation
Patios are notorious for pooling water because they're often poured flat or with minimal slope. Once water sits on concrete, it seeps into cracks and the soil below, destabilizing the slab.
Concrete drainage channel installation basics
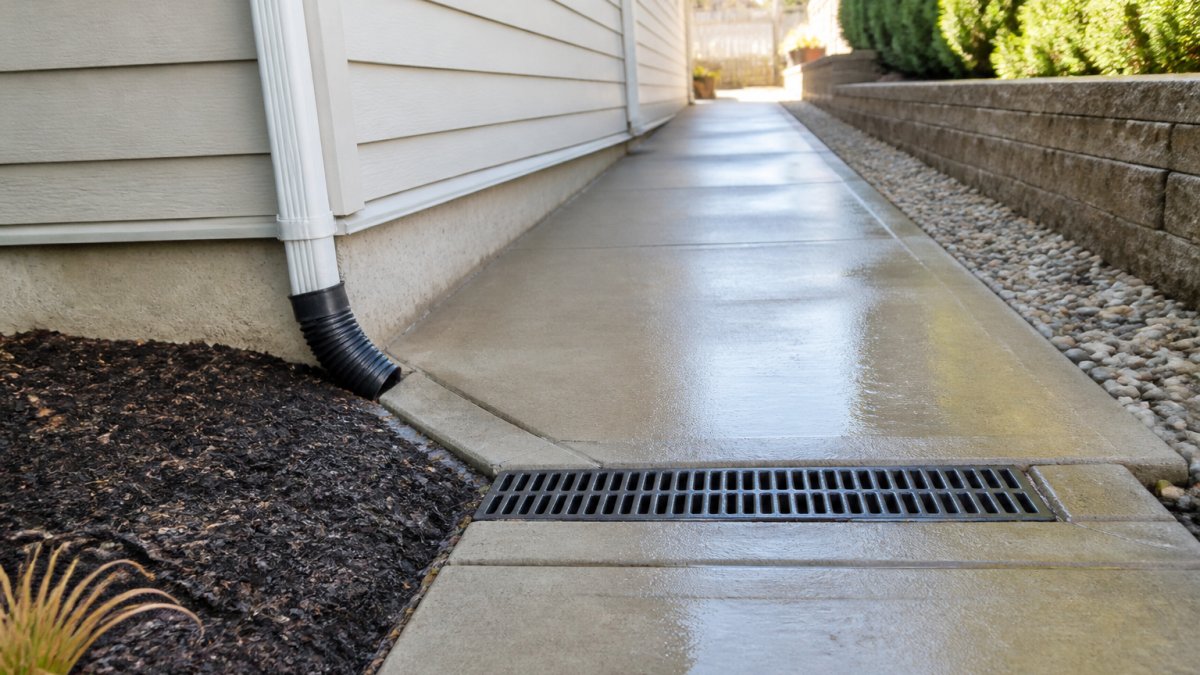
A concrete drainage channel is a recessed trough that catches water at the patio's edge. Water flows in and runs downhill to a discharge point. It's a surface solution, not a deep trench, and works well for patios. Channels are typically installed during new pours but can be cut into existing concrete:
-
Identify the low edge of your patio, the side where water naturally flows.
-
Cut a trench along that edge, 4 to 6 inches wide and 3 to 4 inches deep, using a concrete saw or grinder. The trench should slope downhill.
-
Install a channel insert (plastic or metal) into the trench, or simply leave the trench open as a drainage channel.
-
Connect the channel to a drain pipe or daylight outlet. Water flows into the channel, then into the pipe, and away from your property.
-
Seal the edges where the channel meets the concrete to prevent water from seeping underneath.
Concrete channels work best when the patio has a definable low edge, you can route water to a safe discharge point, and the channel can be sloped consistently (at least 1/4 inch per 10 feet). Large patios or multiple low spots may need multiple channels or a combination of channels and French drains.
Repair or Replace Damaged Drainage Pipes
If your property has an existing drainage system, buried pipes, catch basins, or underground channels, it may be clogged, cracked, or broken. Water pooling could mean the system isn't working.
Signs of a failed drainage system:
- Water pools in the same spots every rain
- Wet soil or muddy areas appear even after light rain
- Cracks appear in concrete near the pool areas
To diagnose a broken pipe, you need to locate it, and existing systems are often unmarked. You can:
- Dig test holes along the likely path to expose and inspect the pipe
- Use a plumbing camera (a waterproof camera on a cable) to spot clogs or cracks inside
- Call a drainage specialist to use ground-penetrating radar to locate pipes without digging
Once you've found the problem:
- Clear clogs with a plumbing auger or pressure washer. Roots, sediment, and debris clog pipes over time.
- Patch small cracks with epoxy or concrete repair compound.
- Replace severely damaged sections by excavating the pipe and installing new PVC or corrugated pipe.
Repairing drainage pipes is cheaper than installing new ones only if the damage is minor. Extensive root intrusion, multiple cracks, or complete collapse usually means replacement.
Safe Excavation, Permits, and When to Call a Professional
Before you dig, you need to know what's underground. Utilities, gas, electric, water, sewer, telecommunications, can be buried where you plan to excavate. Hitting a gas line is dangerous. Cutting a power line can kill you.
Locate utilities before digging
Call 811 before any excavation. This free national utility locating service needs at least 3 business days' notice, and a technician will mark underground utilities with spray paint or flags:
- Red = Electric
- Yellow = Gas
- Blue = Water
Hand-digging is safer than machine digging in marked areas. Use a spade, not a backhoe, within 2 feet of marked utilities.
Check local permit requirements
Most drainage work requires a permit. This varies by city and county, but generally:
- Grading and fill may not need a permit if you're just reshaping existing ground
- French drains and subsurface systems usually need one because they affect water flow and may impact neighbors
- Concrete work (overlays, channels) may need one if it changes the property's drainage
Contact your city or county building department before starting. Permits typically cost $50 to $200 and take 1 to 2 weeks to approve, and skipping one can result in fines, liens, or forced removal of your work.
When to hire a drainage professional
DIY drainage work is possible, but mistakes are expensive. Hire a professional if your property has complex drainage issues, you need a sump pump or dry well, excavation is deep or near utilities, your soil is dense clay requiring heavy equipment, you're unsure about slope calculations or discharge points, or your city requires a licensed contractor.
A drainage specialist can assess your property, design a system, pull permits, and install it correctly. Call for a free estimate.
Verify Your Work and Maintain Drainage Long-Term
Once your drainage system is installed, test it.
Common problems after installation:
- Water still pools in the same spot, The slope may be too shallow, or the drain isn't connected properly
- Water pools in new spots, You may have redirected it to another low area
- The drain isn't flowing, The outlet may be blocked, or the pipe may have settled and lost slope
If any of these happen, dig up the problem area and fix it. Small adjustments now prevent bigger failures later.
Maintain your drainage system:
- Clean gutters and downspouts twice a year (spring and fall) to prevent clogs
- Inspect French drains and channels after heavy rain for sediment, debris, or standing water
- Regrade as needed. Soil settles, so add fill and recompact every 3 to 5 years
Proper drainage protects your concrete and foundation for decades. Neglect it, and you'll face expensive repairs; the investment now saves you thousands later.
Concrete drainage around house issues don't resolve themselves. Water will continue to pool, seep, and damage your foundation and concrete surfaces.
Frequently Asked Questions
How do you improve drainage around a concrete slab?
Improve drainage around a concrete slab by correcting ground slope so water flows away from the foundation at a fall of at least 1 inch per 10 feet. Add gravel trenches or install a French drain alongside the slab, extend downspouts at least 4-6 feet away, and consider a concrete drainage channel if water consistently pools. The key is creating positive drainage that moves water away from the structure before it saturates the soil.
What is the best way to redirect water away from a foundation?
The best way to redirect water away from a foundation combines several methods: grade soil away from the foundation, extend downspouts at least 4-6 feet, install a French drain or perforated drain tile around the perimeter, and use catch basins or channel drains where water naturally collects. For concrete slabs and patios, a concrete drainage channel installation can intercept surface runoff before it reaches the foundation. The method you choose depends on your soil type, water volume, and budget.
Can a French drain help with water pooling beside concrete?
Yes, a French drain is highly effective for stopping water pooling beside concrete. It works by collecting water in a perforated pipe surrounded by gravel, then directing it to a safe discharge point. French drains can be installed alongside driveways, patios, and foundations. They handle both surface runoff and subsurface water, making them a comprehensive solution for persistent pooling problems.
When should a concrete drainage problem be repaired by a professional?
Call a professional if water pooling is causing concrete cracking or settling, if you need to excavate near utilities or the foundation, if local permits are required, or if the problem persists after grading adjustments. Professional assessment is also recommended if you're unsure about slope measurements, soil conditions, or whether structural damage has already occurred. A professional can diagnose root causes and design a permanent solution rather than temporary patches.