 How-to
How to Design Safe Pedestrian Walkways in Parking Lots
Last Updated: November 7, 2026
Quick Summary
Design pedestrian walkways in parking lots by planning routes before painting stall lines. Map where people actually walk, separate them from vehicle traffic with raised, continuous paths, and place short, highly visible crossings where drivers expect people.
- Walk the site as a customer would and map the routes people actually take.
- Use raised curbed walkways to separate pedestrians from vehicle traffic wherever possible.
- Keep crossings as short and straight as possible, perpendicular to the drive aisle.
- Use wide longitudinal bars for crosswalks, which are more visible to drivers than thin lines.
- Inspect walkways after heavy rain and at least once each season, and repaint faded markings.
Table of Contents
- Step 1: Assess the Site and Map Pedestrian Routes
- Step 2: Separate Pedestrians From Vehicle Traffic
- Step 3: Plan Pedestrian Crossings and Crosswalk Design
- Step 4: Set Walkway Widths, Dimensions and Accessible Routes
- Step 5: Improve Lighting, Signage and Pavement Markings for Visibility
- Loading Zones, Maintenance and Ongoing Inspection
- Scheduling Your Walkway Assessment With Houston Pavement Repair
- Frequently Asked Questions
Parking lots are where many customer injuries begin. A shopper walks between parked cars, a driver backs out without seeing a pedestrian, and a trip to the store ends in an incident report.
Pedestrian walkways are dedicated paths that keep people on foot apart from vehicle lanes. A well-designed walkway is continuous, clearly marked, and connected to the building entrance. Without one, pedestrians end up sharing the drive aisle with cars, and that shared space is where most conflicts happen.
A common mistake is treating walkways as an afterthought. Owners add striping and stall lines first, then try to squeeze a path in wherever space is left. Keeping pedestrian routes continuous from the entrance to each destination also makes commercial parking lot striping easier to coordinate with accessible crossings and clear sightlines.
What to plan for before you pave:
- Clear routes from parking spaces to building entrances
- Walkways that stay continuous across the whole lot
- Crossings placed where drivers expect to see people
- Lighting and markings that work after dark
The steps below walk through a practical process, from site assessment through ongoing inspection. Each step builds on the one before it, so work through them in order rather than jumping straight to the paint.
Step 1: Assess the Site and Map Pedestrian Routes
Start by walking the site as a customer would. Note where people park, where the entrances are, and where they naturally cut across the lot to get there. Those desire lines are the routes your walkway needs to serve, even if they feel informal today.
Sketch a simple map showing parking zones, entrances, loading areas, and the paths people actually take. Mark any spot where pedestrians and vehicles already meet. These conflict points are your priority list.
Assessment checklist:
- Count and map every entrance a pedestrian uses
- Note the busiest hours and peak foot traffic
- Mark every spot where cars and people cross paths
- Identify drive aisles that carry the most vehicle traffic
Watch out: Mapping only the front entrance misses the side doors and delivery paths where many incidents happen.
Step 2: Separate Pedestrians From Vehicle Traffic
The goal is to keep people off the drive aisles wherever you can. Give pedestrians their own path, and where a crossing is unavoidable, make it short, visible, and obvious.
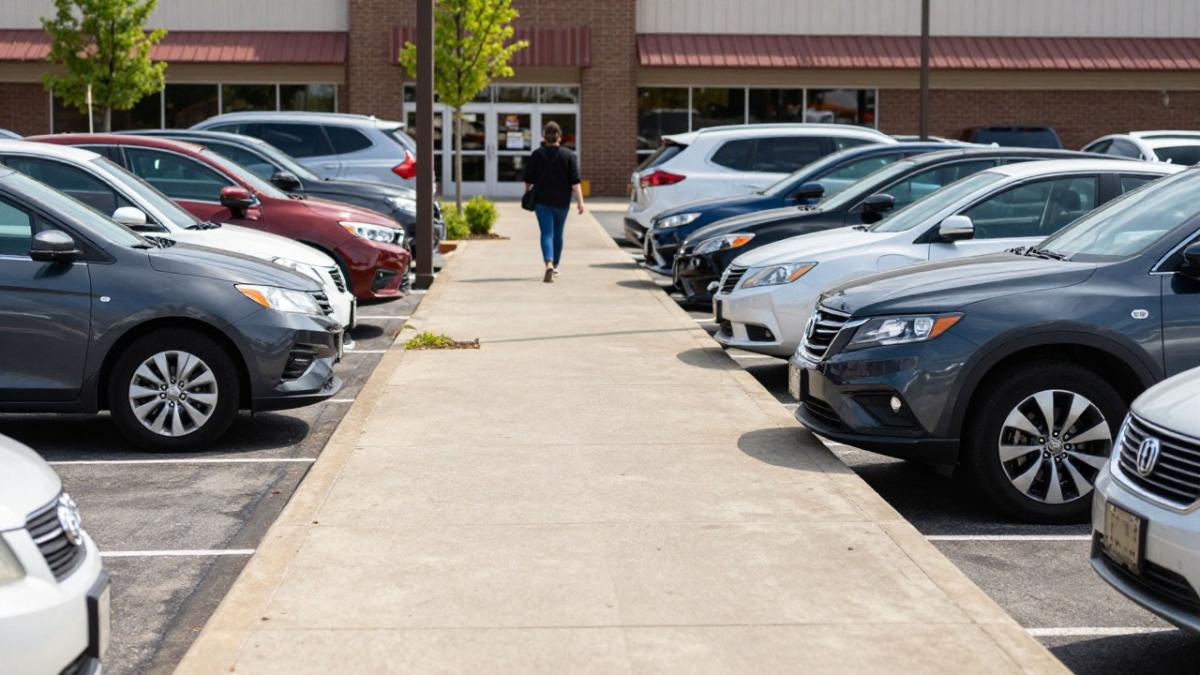
!Raised curbed walkway beside parked cars in a commercial parking lot
Raised Walkways, Curbs and Sidewalk Connections
A raised walkway with a curb is the strongest separation you can build. It gives people a clear physical boundary and keeps cars from drifting onto the path. Where a walkway meets a drive aisle, a curb ramp or a painted crossing signals to drivers that people may be present.
Connect every walkway to the public sidewalk and to the building entrance. A walkway that dead-ends in the lot forces people to find their own way, and they will take the shortest route through traffic.
Step 3: Plan Pedestrian Crossings and Crosswalk Design
Crossings are where vehicle-pedestrian conflicts peak, so they need the most attention. Place crosswalks where people naturally cross, not where it is easiest to paint. Aim for a straight line across the drive aisle, keeping the crossing as short as possible.
Use high-visibility markings for crosswalks, such as wide bars or a continental pattern, so drivers notice them at a distance. Pair the crossing with signage and, where practical, a raised crossing or speed table to slow vehicles down.
Watch out: A crosswalk placed behind a row of parked cars hides pedestrians from drivers until it is too late. Keep the sightline clear.
Step 4: Set Walkway Widths, Dimensions and Accessible Routes
Width and geometry are where a walkway design either works or fails. A path that looks fine on a sketch can be unusable once light poles, carts, and snowbanks crowd it. Set dimensions early, before stall lines are painted, so the walkway gets the space it needs.
Walkway Width
Walkway width should allow two people to pass comfortably and accommodate strollers and carts where traffic is heavy. Keep the clear width free of obstructions: light poles, sign posts, planters, and bollards should sit outside the walking zone, not narrow it. A common pattern is to place fixtures in a separate furniture zone between the walkway and the drive aisle.
Crossing Dimensions
Keep crossings as short and straight as possible. A crossing that runs perpendicular to the drive aisle minimizes the distance a pedestrian is exposed to moving vehicles. Where a crossing spans multiple lanes, a raised or curbed end island gives people a refuge and lets them judge one direction of traffic at a time. Mark crosswalks with wide longitudinal bars (a continental pattern) rather than two thin parallel lines, because the bars are more visible to drivers at a distance and in rain.
Accessible Routes and ADA Criteria
Accessible routes must connect accessible parking spaces to the building entrance and to the public sidewalk. Under the Americans with Disabilities Act, accessible routes must meet specific width and surface requirements (Chapter 4: Accessible Routes). Check the current ADA standards for exact figures. Where the route changes level, provide curb ramps with flared sides or returned curbs. Slope limits on accessible routes are set by the current ADA standards, which should be checked directly for exact requirements.
Universal Accessibility Beyond Wheelchair Access
Accessibility is broader than a ramp at the door. People with low vision depend on contrasting edges, detectable warnings, and consistent lighting to find the path. Detectable warning surfaces at curb ramps help a person using a cane feel the transition from sidewalk to drive aisle. Use color and texture contrast at walkway edges and crossings. Wayfinding signs with large, high-contrast lettering and simple icons help people with cognitive disabilities and older adults navigate a lot without asking for directions.
Watch out: A route can meet a width target on paper and still fail if a sign post or planter reduces the clear width in practice, measure the narrowest point, not the widest.
The article sets out key walkway and crossing dimensions to plan for before paving:
| Element | Guidance | Note |
|---|---|---|
| Walkway width | Two people can pass comfortably | Add room for strollers and carts |
| Crossing length | As short and straight as possible | Perpendicular to the drive aisle |
| Crosswalk marking | Wide longitudinal bars | More visible than thin parallel lines |
| Clear width | Measure the narrowest point | Fixtures must not reduce it |
| Accessible route | Meets current ADA standards | Check exact width and slope figures |
Step 5: Improve Lighting, Signage and Pavement Markings for Visibility
Many lots feel safe in daylight and become hazardous after dark. Good lighting along walkways and crossings lets drivers see people and lets people see the path. Aim light at the walking surface, not just the stalls, and avoid dark pockets between light poles.
Pavement markings do much of the work. Bright, well-maintained striping defines the walkway, crosswalk, and stall lines. Add signage at entrances and crossings to remind drivers to watch for people.
Loading Zones, Maintenance and Ongoing Inspection
Most walkway guidance stops at the paint and the curb. The risks that persist after construction, delivery trucks blocking the path, rideshare pickups in the drive aisle, faded markings, snowbanks, and standing water, are where a safe design quietly degrades. Plan for these conflict points and build a maintenance routine that keeps the walkway usable year-round.
Loading Zones, Pickup Areas and Other Conflict Points
Delivery vehicles, rideshare pickups, and event traffic create conflicts that general layout advice misses. Keep loading zones and pickup areas off the main pedestrian route where possible, and mark them clearly so drivers and walkers both know the boundaries. Where a loading zone must cross a walkway, use a marked crossing and keep the sightline clear. For rideshare and passenger pickup, designate a curbside area with signage rather than letting cars stop in the drive aisle. Accessible loading areas need a level surface and a clear route to the entrance, not just a sign. School or event traffic can overwhelm a lot at peak times; plan a separate drop-off loop or a staffed crossing where volumes spike.
Maintenance and Seasonal Operations
A safe design only stays safe if it is maintained. Cracks, potholes, and standing water on a walkway create trip hazards and push people into the drive aisle to get around them. Standing water can freeze in winter. Inspect walkways after heavy rain and at least once each season. Fix cracks and drainage problems quickly, and keep snow and debris cleared from the path. Repaint faded markings on a regular schedule, because worn paint stops guiding anyone. Trim vegetation so it does not obscure signs, crossings, or sightlines.
Evaluation and Performance Measurement
Walk the lot after dark to confirm lighting performance along walkways and crossings. Document what you find so problems are tracked and fixed, not forgotten. Schedule a walkway inspection once a year, and after any major repair or repaving.
Watch out: A walkway that is clear in summer can disappear under a snowbank in winter, forcing pedestrians into the drive aisle, plan snow storage areas away from the path, not on it.
Scheduling Your Walkway Assessment With Houston Pavement Repair
If your lot has crossings that feel risky, walkways that disappear, or drainage that leaves puddles along the path, a professional assessment is the fastest way to find the fix. Houston Pavement Repair LLC provides paving and repair services, and pricing depends on the size of the lot, the scope of the work, and the materials needed. For current pricing or a quote, visit the Houston Pavement Repair LLC website. Call now to schedule your free estimate.
BUTTON: Schedule Your Free Estimate CARD_TITLE: Is your lot safe for walkers? CARD_TEXT: Houston Pavement Repair LLC assesses, repairs, and redesigns parking lot walkways across Texas.
Frequently Asked Questions
How wide should a pedestrian walkway be in a parking lot?
A pedestrian walkway should be wide enough for two people to pass comfortably, and a common target is at least 5 feet of clear width so wheelchairs and strollers can move without leaving the path. Where a walkway runs alongside parking spaces with vehicle overhang, add width so the overhang does not reduce the clear path. Measure clear width after considering bollards, light poles, landscaping and curb ramps. Walkways that narrow at these obstacles create conflict points where people step into the drive aisle. Check local codes and accessibility standards, since requirements vary by jurisdiction and project type.
Where should crosswalks be placed in a parking lot?
Place crosswalks where the most natural pedestrian path crosses vehicle lanes, usually at the ends of parking rows, near building entrances and across main drive aisles. Keep crossings as short as possible and line them up with the walkway so people do not have to angle through traffic. Raised or curbed end islands at crossings help define the route and protect pedestrians from turning vehicles. Observe where people actually walk before finalizing locations, because worn paths often reveal the desired crossing point.
What pavement markings make parking lot walkways safer?
High-contrast crosswalk stripes, painted or thermoplastic walkway outlines and stop bars placed before crossings all improve pedestrian safety. Use durable markings in high-traffic areas and refresh them when they fade, since faded lines lose their effect on drivers. Pair markings with signs at crossings and entrances. Markings are most useful when they clearly show drivers where pedestrians will be, so avoid placing them where they might suggest a path that does not connect to a building entrance.
How often should parking lot walkways and markings be inspected?
Inspect walkways and markings at least once a year and after severe weather, since freeze-thaw cycles, heavy rain and sun exposure can crack surfaces and fade paint. Check for trip hazards such as heaved slabs or cracked asphalt edges, worn curb ramps, blocked sightlines and burned-out lights. In Houston and Katy, Texas, heavy rainfall can cause drainage problems that accelerate pavement deterioration, so include drainage checks in every inspection. Keep a written log of repairs to track recurring problem areas.