 How-to
DIY Driveway Soil Compaction: A Step-by-Step Guide
Last Updated: October 22, 2026
Quick Summary
Driveway soil compaction is the foundation of any lasting driveway installation, with the soil beneath determining how well it supports weight, sheds water, and resists settling. Proper compaction requires working in 4-inch lifts with the right moisture content, using a plate compactor or manual tamping, and testing that your foot sinks no more than a quarter inch into the finished surface.
- Most residential driveways use 4-inch lifts per compaction layer for even density and proper weight distribution.
- Ideal soil moisture for compaction is 8 to 12 percent; squeeze a handful and it should hold together lightly but crumble under pressure.
- Plate compactors typically rent for $60 to $120 per day and handle a standard residential driveway in a few hours.
- A driveway crown should rise 1/8 inch per foot of width to direct water runoff and prevent pooling.
- The foot test verifies compaction quality: your foot should not sink more than a quarter inch into the compacted surface.
Table of Contents
- Understanding Soil Types and Driveway Base Requirements
- Preparing the Subgrade and Setting Driveway Base Layer Thickness
- Choosing Compaction Equipment for Your Driveway
- How to Compact a Road Base by Hand
- How to Compact Gravel Driveway Surfaces
- Testing Compaction Quality and Preventing Common Failures
- Drainage, Slope, and Long-Term Driveway Performance
- When to Call a Professional
- Frequently Asked Questions
Understanding Soil Types and Driveway Base Requirements
Driveway soil compaction is the foundation of any lasting driveway installation. The soil beneath determines how well it supports weight, sheds water, and resists settling.
Most homeowners skip this step, assuming all dirt is the same. The wrong soil type leads to rutting, cracking, and premature failure.
Identifying Your Soil Type
Dig a test hole about 12 inches deep in your planned driveway area and examine a handful of soil.
Sandy soil feels gritty, won't hold together when squeezed, and drains quickly but offers less stability.
Clay soil feels sticky when wet, holds together firmly, resists drainage, and can shift if not properly compacted.
Silt feels smooth and powdery, somewhere in between.
The best driveway base combines these materials.
Assessing Soil Condition Before Compaction
Before driveway soil compaction work, check the moisture level of your subgrade.
Squeeze a handful of soil in your fist.
Remove debris, roots, or organic material from the top few inches before compaction.
Fill low spots where water pools with compacted material to create a slight crown (higher in the middle) so water runs off to the sides.
Preparing the Subgrade and Setting Driveway Base Layer Thickness
The subgrade is the soil directly beneath your driveway. Preparing it correctly prevents future settling and drainage problems. Your driveway base layer thickness determines how well the structure distributes weight and resists cracking.
Measuring and Marking Lift Thickness
Lift thickness is how deep each layer of material goes before compaction.
Mark your lift thickness with wooden stakes or spray paint, and run a string line at the correct height.
Add material to reach your marked line, but don't exceed 6 inches per lift. Thicker lifts don't compact evenly, leaving soft spots that settle later.
Moisture Content and Adding Water
Soil compacts best with the right moisture: too dry and it won't bind, too wet and it stays loose.
The ideal moisture range for most soils is 8 to 12 percent.
Water your material before spreading it, using a garden hose or small truck-mounted sprayer.
On dry days, water may evaporate faster than expected, so work in sections and keep material damp as you compact.
Choosing Compaction Equipment for Your Driveway
The right equipment for driveway soil compaction depends on area size, soil type, and budget. Larger areas need powered equipment; small repairs or tight spaces work with hand tools.
Plate Compactor for Driveway Work
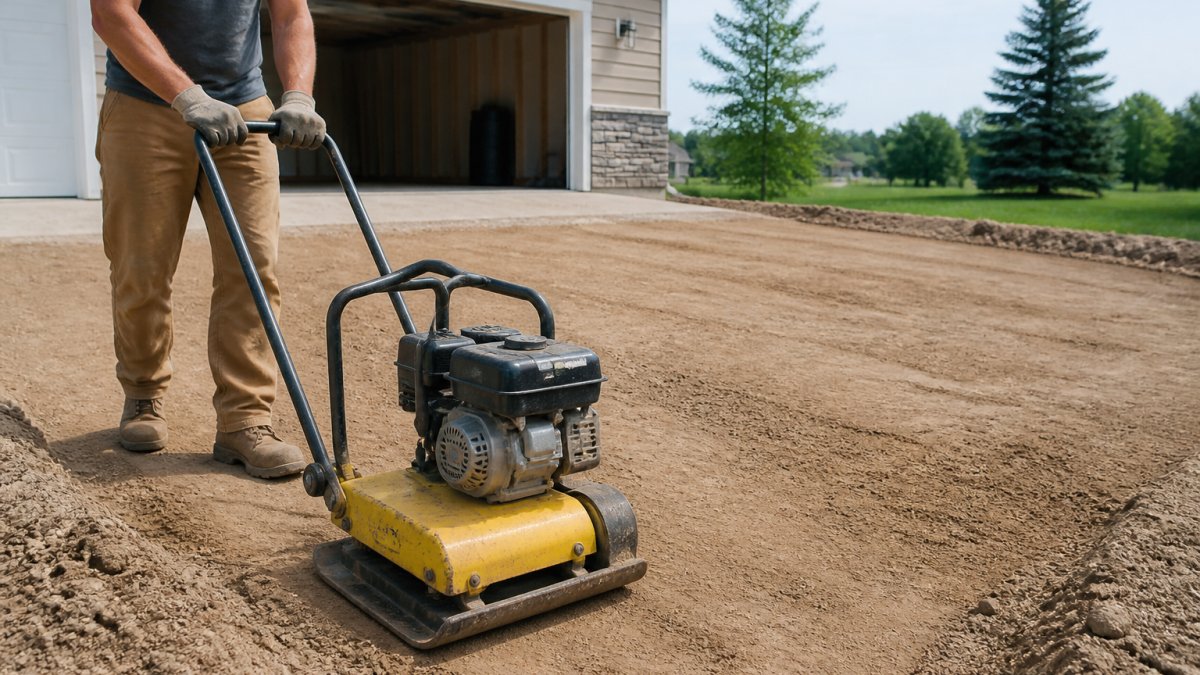
A plate compactor is a powered machine with a flat, vibrating base. It's the standard choice for residential driveway base preparation.
Plate compactors come in forward-only and reversible types.
Rent a plate compactor for a day or two; most rental shops charge $60 to $120 per day.
Operate the compactor in overlapping passes, each overlapping the previous by about half the plate width, to ensure complete coverage and even compaction.
Rollers and Manual Tamping Methods
Smooth-wheeled and tamping foot rollers are alternatives to plate compactors, less common for residential work but useful in specific situations.
A smooth-wheeled roller works well on larger, flatter areas, applying static weight rather than vibration.
A tamping foot roller (sheep's foot roller) has raised feet on the drum that dig into material and compact it from the bottom up.
How to Compact a Road Base by Hand
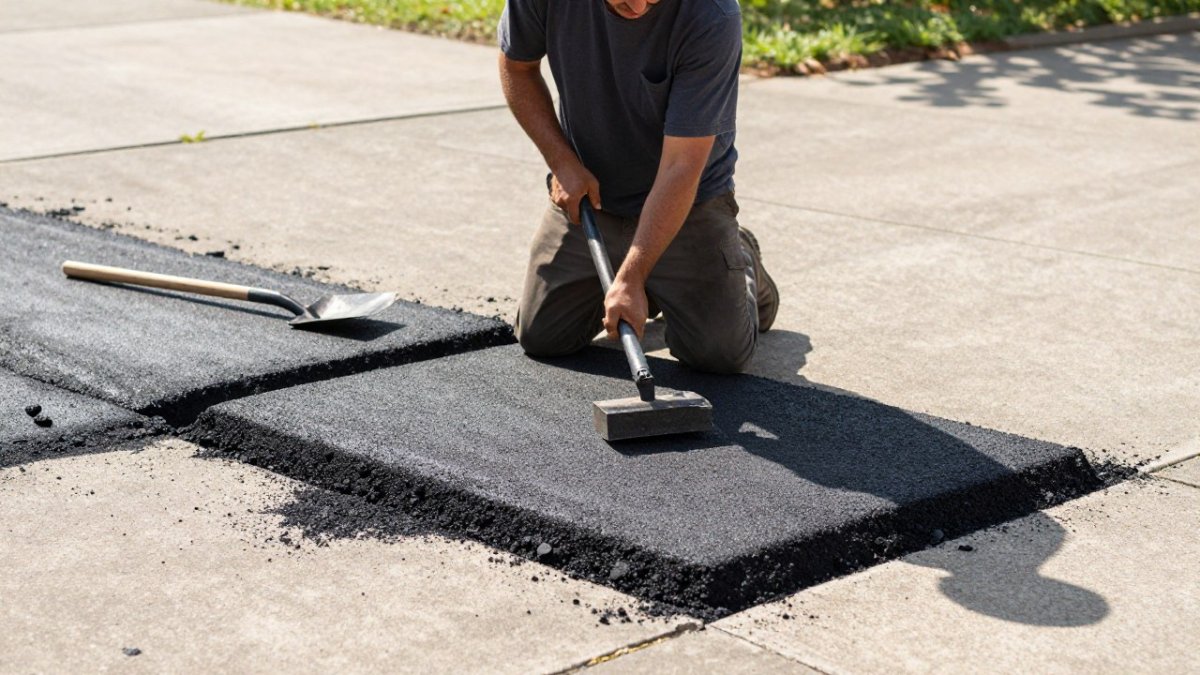
Manual compaction works for small driveways, repairs, or areas where equipment can't fit. Technique matters more than the tool; improper manual compaction leaves soft spots that settle and crack later.
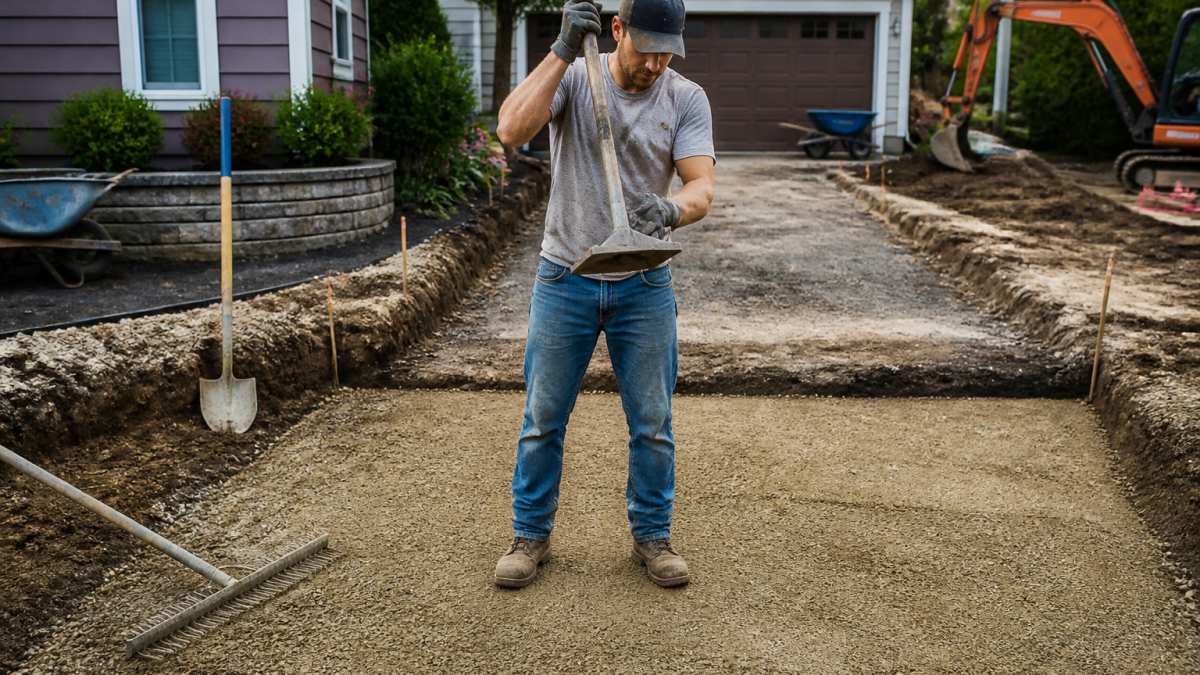
Manual Tamping Technique and Coverage
Stand with your feet shoulder-width apart. Grip the tamper handle with both hands.
Tamp each spot 8 to 10 times before moving to the next spot. Overlap your tamp marks slightly to ensure complete coverage. Work in a grid pattern across the entire area so no section gets missed.
Tamp in straight lines or a checkerboard pattern. This systematic approach prevents gaps. Random tamping leaves weak spots.
The compacted soil should feel firm underfoot. Step on it after tamping. If your foot sinks more than a quarter inch, tamp that spot again.
Compacting in Layers or Lifts
Never try to compact the entire depth in one session. Work in layers.
Each lift must be fully compacted before adding the next one.
Call now to schedule your free estimate →
Count your tamp strikes on the first spot.
After compacting each lift, check the surface with a straightedge. High spots and low spots indicate uneven compaction.
How to Compact Gravel Driveway Surfaces
The top layer of your driveway often uses gravel or crushed stone. This layer needs compaction just like the base, but the material is different and requires a different approach.
Gravel Selection and Aggregate Types
Crushed stone (called #57 stone or #411 stone) is the best choice for compaction.
Pit run (crusher run) is a mix of crushed stone and stone dust.
Marble chips or decorative gravel look nice but don't compact well.
Sand alone is not suitable for driveway compaction. It shifts under vehicle weight and offers no stability.
Compacting Gravel Layers for Stability
Spread your gravel in 2-inch lifts for the top surface layer.
Water the gravel lightly as you spread it.
Use a plate compactor on the lowest setting for gravel. High vibration can scatter light material.
After compacting, the surface should feel solid. A vehicle tire should not sink noticeably into the gravel.
Testing Compaction Quality and Preventing Common Failures
After compaction, verify that your work meets standards. Poor compaction shows up as settling, rutting, or cracking within months. Testing now prevents costly repairs later.
Field Tests for Ground Firmness
The simplest test is the foot test. Walk across the compacted surface with your full weight on one foot.
A more precise test uses a straightedge and a ruler. Lay a 10-foot straightedge across the compacted surface. Measure any gaps under the straightedge.
The plate bearing test is more technical but gives the best results.
Identifying Overcompaction and Settlement Issues
Overcompaction is possible, though rare in manual work.
Settlement happens when compaction is incomplete. The material shifts and compacts further under vehicle weight.
Prevent settlement by fully compacting each lift before adding the next one. Don't rush the process. Proper compaction takes time.
If settlement occurs after your driveway is finished, add more material and recompact the affected area.
Drainage, Slope, and Long-Term Driveway Performance
Proper drainage is as important as proper compaction. Water is the enemy of any driveway. It weakens the base, causes settling, and accelerates surface failure.
Crown and Slope Design for Water Runoff
The driveway should be slightly higher in the middle than at the edges.
A typical crown is 1/8 inch of rise per foot of width. For a 10-foot-wide driveway, the center should be 1.25 inches higher than the edges. This is gentle enough to be nearly invisible but effective at shedding water.
The overall slope from top to bottom of the driveway should be at least 1 percent (1 inch of drop per 100 inches of length).
Check your slope during the subgrade preparation stage. Use a long level and measure the drop.
Preventing Rutting and Settling
Rutting occurs when the base layer is too soft to support vehicle weight.
Prevent rutting by ensuring complete compaction of all base layers. Each lift must be fully compacted.
Settling is different from rutting. It happens when the entire surface drops slowly over months or years.
Monitor your finished driveway.
A well-compacted driveway base resists both rutting and settling.
When to Call a Professional
DIY driveway soil compaction works for small projects and repairs.
If you notice existing settlement, large cracks, or severe drainage problems, a professional assessment is worth the cost.
If your driveway project exceeds your comfort level or you want professional-grade results, we're ready to help.
Proper driveway soil compaction prevents costly repairs and extends your driveway's lifespan significantly.
Frequently Asked Questions
How do you know if soil is compacted enough for a driveway?
Properly compacted driveway soil should resist foot pressure and not show rutting or settling under weight. Perform a simple test: press your boot heel firmly into the surface; if it leaves a mark deeper than 1/4 inch, the soil needs more compaction. Professional contractors use a penetrometer to measure soil density, but for DIY work, repeated passes with a plate compactor or hand tamper until the surface feels firm and stable indicates adequate compaction. A driveway base layer thickness of 4-6 inches, properly compacted, typically provides sufficient stability for residential use.
Should you wet soil before compacting it for a driveway?
Yes, moisture content is critical for effective soil compaction. Soil compacts best at optimal moisture levels, typically between 10-15% for most soil types. If soil is too dry, add water gradually using a garden hose or sprinkler, then allow it to absorb for several hours before compacting. If soil is too wet, allow it to dry slightly or mix in sand to improve drainage. Test moisture by squeezing a handful: it should hold together but not form mud. Proper moisture helps soil particles bind together, creating a firmer, more stable base that resists settlement and rutting.
What is the best way to compact gravel on a driveway?
Gravel compaction requires a plate compactor or hand tamper applied in multiple passes over each section. Start with larger aggregate (such as #57 stone) as the base layer, then add smaller crushed stone on top. Compact each layer separately to 4-6 inches thickness before adding the next layer. Make 3-4 passes with a plate compactor over the same area, overlapping each pass slightly to ensure complete coverage. Wet the gravel lightly before compacting to help particles settle and bind. This layered, multi-pass approach ensures the gravel driveway remains stable and resists rutting under vehicle weight.
Can I rent equipment to compact my driveway, or should I hire a professional?
Plate compactors and hand tampers are widely available for rent at equipment rental centers, typically costing $40-$80 per day. For small driveways (under 500 square feet), manual tamping or a rented plate compactor is practical. For larger areas or if the soil is heavily compacted or contains clay, professional equipment and expertise may save time and ensure better results. If your driveway has drainage problems, poor slope, or a history of cracking, professional assessment and compaction can identify and address the root cause. Houston Pavement Repair LLC can evaluate your specific needs and recommend whether DIY compaction or professional preparation is best for your project.