 How-to
How to Create a Commercial Pavement Maintenance Plan
Last Updated: October 23, 2026
Quick Summary
A commercial pavement maintenance plan is a structured approach that tells you what pavement needs attention, when, and how much to budget, helping you catch small problems before they become expensive and extending your lot's lifespan from 5 years to 15-20 years.
- Start with a pavement condition assessment using a 1-10 scale to document cracks, potholes, and deterioration across sections.
- Schedule preventative maintenance every 2-4 times per year for inspections, crack filling every 1-3 years, and sealcoating every 2-3 years.
- Budget 50-60% for preventative work, 30-40% for corrective repairs, and 10% or more for reserves to avoid emergency costs.
- Document all inspections with photos and scores, convert observations into work orders, and track condition changes quarterly to measure plan effectiveness.
Table of Contents
- Why Your Commercial Property Needs a Pavement Maintenance Plan
- Step 1: Conduct a Pavement Condition Assessment
- Step 2: Build Your Commercial Asphalt Maintenance Schedule
- Step 3: Develop Your Commercial Pavement Maintenance Checklist
- Step 4: Plan Your Pavement Maintenance Budget
- Step 5: Address Drainage and Safety Compliance
- Step 6: Document and Track Your Plan
- Executing Your Plan: Common Mistakes to Avoid
- Frequently Asked Questions
Why Your Commercial Property Needs a Pavement Maintenance Plan
A commercial pavement maintenance plan is the difference between a lot that lasts 15 years and one that crumbles in five. Without one, you're reactive, patching cracks and filling potholes as they appear, which costs more and leaves your property looking neglected. A structured commercial pavement maintenance plan tells you what needs attention, when, and how much to budget, so you catch small problems before they get expensive.
Step 1: Conduct a Pavement Condition Assessment
You can't build a maintenance plan without understanding your pavement's current state.
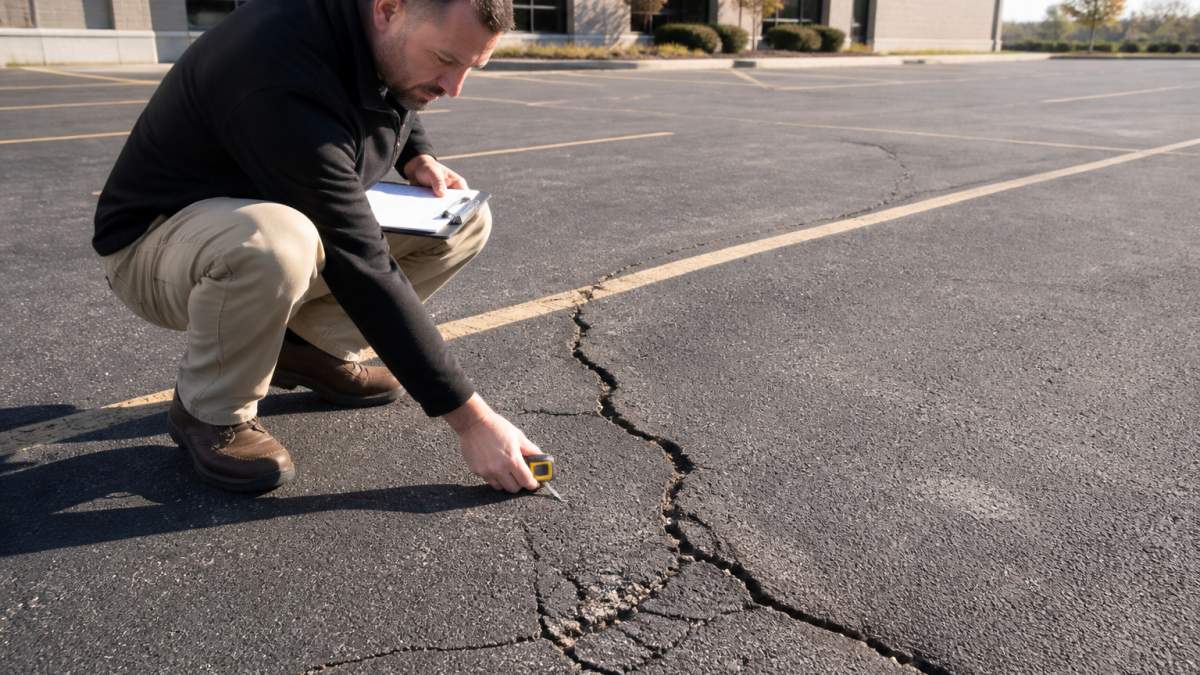
A pavement condition assessment means walking your property and documenting what you see, all you need is a clipboard, a camera, and about 30 minutes.
What to Document During Your Site Visit
Walk every inch of your parking lot or private roadway. Look for:
- Cracks, hairline, quarter-inch wide, or larger
- Potholes, small divots or deep holes
- Surface deterioration, fading, raveling, or loose aggregate
Photograph problem areas, note location and severity, and build a visual inventory. Also document site-specific conditions: pavement age, traffic volume, overhead trees, drainage, and climate. These details matter: hot, dry climates age pavement differently than freeze-thaw cycles, and high-traffic properties deteriorate faster.
Get a free pavement repair quote to understand what professional evaluation and repair options look like.
Scoring Your Pavement Condition
Use a simple 1-10 scale to track changes over time:
- 9-10: Excellent. Minimal wear. No repairs needed yet.
- 7-8: Good. Minor cracks or wear. Routine maintenance only.
- 5-6: Fair. Multiple cracks, some potholes, visible deterioration. Maintenance plus minor repairs needed.
Score each section separately, a large property may have different condition levels in different zones, and date the scores as your baseline.
Step 2: Build Your Commercial Asphalt Maintenance Schedule
Your maintenance schedule is the backbone of your commercial pavement maintenance plan.
A good schedule balances preventative maintenance (stopping problems before they start) with corrective maintenance (fixing existing damage) to extend service life.
Explore a comprehensive 7-step plan for extending pavement lifespan to develop a detailed maintenance schedule tailored to your property.
Preventative Maintenance Cycles
Preventative maintenance keeps small problems from becoming big ones. Schedule these treatments based on your pavement's condition and age:
Routine Inspections (2-4 times per year) Walk your lot quarterly. Look for new cracks, debris, or drainage issues. This takes an hour and catches problems early.
Crack Filling (as needed, typically every 1-3 years) Fill small cracks before water seeps in and weakens the base layer. Crack filling is cheap; replacing a section is expensive.
Sealcoating (every 2-3 years) A sealcoat protects asphalt from UV damage, water penetration, and oxidation, like sunscreen for your pavement. Heavily trafficked areas need it more often.
Debris Removal (weekly to monthly) Clear leaves, dirt, and trash. These trap moisture and accelerate deterioration.
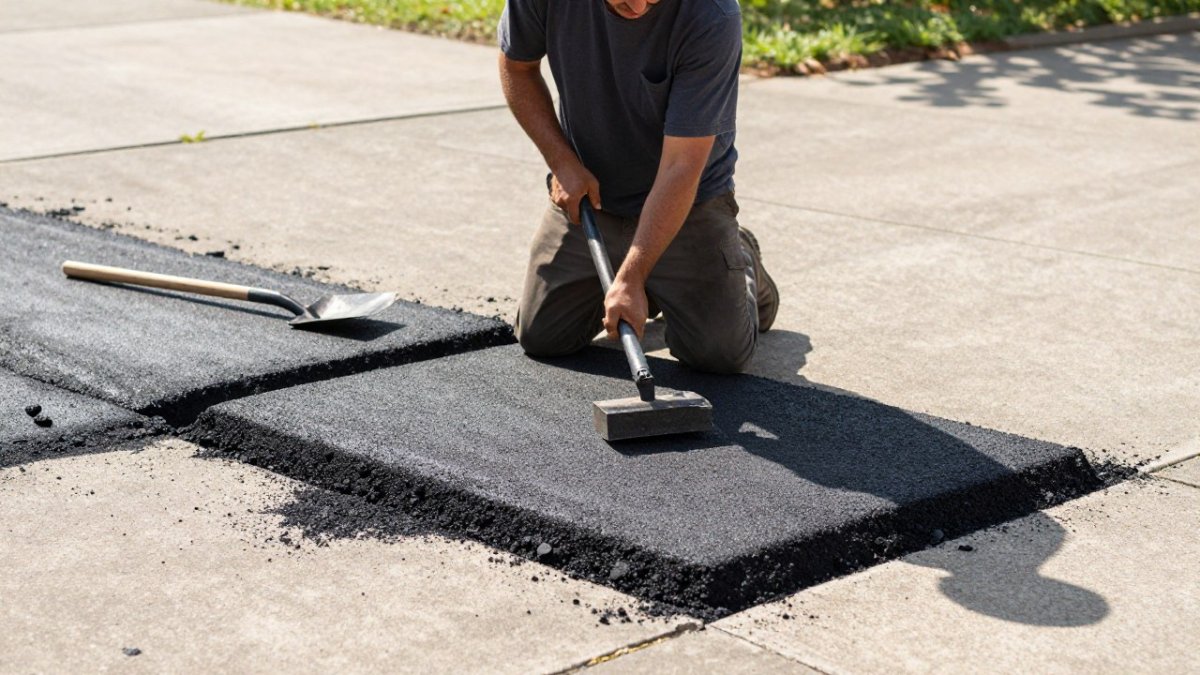
Pothole Patching (as they appear) Small potholes are easy to fix. Large ones are expensive. Patch them quickly.
Corrective Maintenance Priorities
Prioritize corrective maintenance by severity and impact:
- Immediate (within 1-2 weeks), Potholes that create safety hazards or water pooling that damages the base layer
- Short-term (within 1-3 months), Growing cracks, localized surface deterioration, drainage problems
- Medium-term (within 6-12 months), Widespread cracking, worn areas, sealcoat reapplication
- Long-term (1-3 years), Resurfacing or overlay planning for heavily damaged sections
This keeps you from wasting money on non-urgent repairs while addressing real problems quickly.
Schedule preventative maintenance treatments based on your pavement's condition and age to extend its service life.
| Treatment | Frequency | Purpose |
|---|---|---|
| Routine inspections | 2-4 times per year | Catch problems early |
| Crack filling | Every 1-3 years | Prevent water infiltration |
| Sealcoating | Every 2-3 years | Protect from UV and water damage |
| Debris removal | Weekly to monthly | Reduce moisture trapping |
| Pothole patching | As they appear | Fix small issues quickly |
Step 3: Develop Your Commercial Pavement Maintenance Checklist
A checklist turns your maintenance plan from a document nobody reads into an action list.
Your commercial pavement maintenance checklist should include routine tasks and seasonal work.
Routine Inspection Tasks
Perform these tasks monthly or quarterly:
- Walk the entire parking lot and look for new cracks
- Check for potholes or surface deterioration
- Inspect drainage areas for standing water
Seasonal Maintenance Actions
Different seasons bring different challenges:
Spring
- Clear winter debris and salt residue
- Inspect for freeze-thaw damage
- Schedule crack filling and pothole repairs
Summer
- Monitor for heat-related deterioration
- Ensure drainage is working (heavy rains)
- Apply sealcoat if scheduled
Fall
- Clear leaves and debris regularly
- Inspect for new cracks
- Plan winter preparations
Winter
- Manage snow and ice safely
- Avoid damaging salt and de-icing chemicals
- Document any new damage from freeze-thaw cycles
Step 4: Plan Your Pavement Maintenance Budget
Budget planning separates companies that maintain their pavement from those that let it fail, but a budget only works when tied to real treatment costs and a multi-year sequence.
Start With Treatment-Level Cost Ranges
Use these typical U.S. commercial planning ranges to size your budget before requesting bids. They are location-dependent estimates, not quotes; climate, site access, condition, and local labor rates will move them.
- Crack filling or crack sealing: roughly $1 to $4 per linear foot, depending on crack width, routing, and whether a sealant reservoir is cut.
- Pothole patching (throw-and-roll or semi-permanent): roughly $50 to $250 per patch for small repairs; larger or full-depth patches cost more.
- Sealcoating: roughly $0.15 to $0.30 per square foot for a standard two-coat application; heavily oxidized or high-traffic surfaces may run higher.
Convert these ranges into a rough order of magnitude: a 50,000-square-foot lot needing sealcoat and routine crack fill might budget $10,000 to $20,000, while widespread alligator cracking may mean overlay costs in the hundreds of thousands.
Call now to schedule your free estimate →
Compare Lifecycle Costs, Not Just This Year's Bill
Preventative maintenance is cheaper per year of service life than deferred corrective work:
- Preventative path: sealcoat every 2 to 3 years, fill cracks as they appear, patch potholes within weeks. A well-maintained asphalt lot commonly reaches 15 to 20 years before overlay, and concrete can last 30 years or more with joint and panel maintenance.
- Deferred path: skip sealcoat and crack fill, let water infiltrate the base, and rely on emergency patching. The same lot often needs overlay or reconstruction years earlier, and emergency repairs carry premium pricing and disruption costs.
Every $1 spent on timely crack filling and sealcoating commonly avoids several dollars of later patching and overlay work.
Build a Multi-Year Plan With Decision Triggers
A multi-year plan connects condition scores to treatments and tells you when to escalate. Sample five-year sequence for a medium-traffic asphalt lot in fair condition (scores of 5 to 6):
Year 1
- Complete the condition assessment and score each section.
- Clear drainage, remove debris, and complete immediate safety repairs.
- Fill cracks and patch potholes.
Year 2
- Apply sealcoat to sections scoring 5 or above.
- Restripe after sealcoat cures.
- Re-inspect and update scores.
Year 3
- Routine crack fill and pothole patching.
- Clean and repair storm drains and drainage swales.
- Decision point: if repeat potholes appear in the same area, schedule full-depth patching or localized reconstruction.
Year 4
- Sealcoat sections that were treated in Year 2 and have returned to fair condition.
- Plan and budget for overlay of the lowest-scoring section.
- Decision point: if the lowest section scores 3 or below, move overlay into Year 5 and reserve funds now.
Year 5
- Overlay or reconstruct the lowest-scoring section.
- Reassess all sections and reset the five-year cycle.
Adjust the sequence to your climate: in freeze-thaw regions, fill cracks before winter and inspect in spring; in hot climates, watch for rutting and oxidation and consider shorter sealcoat intervals in high-traffic areas.
Allocate Funds Across Categories
Split your annual pavement budget into three buckets so preventative work does not get squeezed out by emergencies:
- Preventative (50-60%): sealcoating, crack filling, routine inspections, drainage cleaning, restriping.
- Corrective (30-40%): pothole patching, localized repairs, panel replacement.
- Reserve (10% or more): unexpected failures, emergency patching, and escalation to overlay or reconstruction.
Review spending against these buckets quarterly. If corrective spending consistently exceeds 40%, your preventative program is underfunded or your assessment is missing early-stage defects.
Learn how to budget for commercial parking lot repairs to calculate realistic costs for your property's specific needs.
Step 5: Address Drainage and Safety Compliance
Drainage problems accelerate pavement failure. When water sits on your pavement or seeps underneath, it weakens the base layer, causing potholes and cracking in freeze-thaw climates, and raveling and surface deterioration in warm ones. Inspect your drainage system: Do areas pool water after rain?
Implement drainage solutions designed for commercial properties to address water management as part of your maintenance strategy.
Step 6: Document and Track Your Plan
A plan only works if you follow it and measure results. Most maintenance plans fail not because the treatments were wrong but because no one recorded what was done, what it cost, or whether condition improved. Build a simple system that turns observations into work orders and work orders into measurable performance.
Use a Repeatable Inspection and Scoring Method
Consistency matters more than sophistication. Inspect the same sections in the same order each time so scores are comparable.
- Divide the property into sections. Use natural boundaries such as parking rows, drive aisles, entrances, loading zones, and private roadways. Number each section and note its approximate square footage.
- Walk each section on a fixed route. Inspect at the same time of day and in similar weather when possible. Record defects by type and severity.
- Score each section on a 1-10 scale using the same definitions every cycle:
- 9-10: Excellent. Minimal wear, no repairs needed.
- 7-8: Good. Minor cracks or wear, routine maintenance only.
- 5-6: Fair. Multiple cracks, some potholes, visible deterioration.
- 3-4: Poor. Widespread damage, frequent potholes, major repairs needed soon.
- 1-2: Critical. Severe damage, resurfacing or overlay likely.
- Record defect quantities. Note linear feet of cracks, number and size of potholes, square footage of alligator cracking, and any drainage or safety issues. Quantities turn a score into a work order.
- Photograph each defect with a date stamp and section reference. Store photos with the inspection record.
Convert Observations Into Work Orders
A score is only useful if it triggers action. Set thresholds in advance:
- Score 7 or above: routine maintenance only; schedule crack fill and sealcoat per the normal cycle.
- Score 5 to 6: generate a work order for crack filling, patching, and drainage repair within the current or next quarter.
- Score 3 to 4: escalate for engineering review and budget for overlay or localized reconstruction within 12 to 24 months.
Attach the inspection record to each work order so the contractor sees the same defect quantities and photos you used to scope the job.
Track Performance With a Small Set of KPIs
Measure the plan, not just the pavement. Track these metrics quarterly and annually:
- Condition-score change: average score across sections versus the prior inspection. A stable or rising average with normal aging suggests the plan is working; a rapid decline signals underfunded prevention or a drainage problem.
- Repair backlog: number and dollar value of work orders open past their target date. A growing backlog predicts accelerated deterioration.
- Cost per square foot: annual maintenance and repair spend divided by pavement area. Compare year over year and against your budget categories.
Review these metrics with ownership or facilities leadership annually and use them to justify the next budget cycle.
Keep Records That Support Budget Requests
Maintain a maintenance log with date, section, work performed, contractor, cost, and before-and-after photos, and keep inspection records, work orders, and bids together.
Adjust the plan based on results: if sealcoating every three years isn't holding up in your climate, shorten the interval; if pothole repairs keep failing in the same spot, schedule full-depth patching or reconstruction instead of another surface patch.
Executing Your Plan: Common Mistakes to Avoid
Building a plan is one thing. Executing it is another.
Skipping preventative work to save money. A crack fill costs a few hundred dollars.
Hiring the wrong contractor. A cheap patch job that fails in six months costs more than a proper repair that lasts five years. Find qualified contractors who understand your property's needs and can execute work that lasts.
Ignoring drainage problems. Water damage accelerates everything. Fix drainage issues immediately.
The best commercial pavement maintenance plan is one you actually follow. Start simple.
Your parking lot or private roadway is a major asset.
Frequently Asked Questions
How often should I conduct a pavement condition assessment for my commercial property?
Most commercial properties benefit from a formal pavement condition assessment annually, with informal visual inspections every quarter. Properties in harsh climates or with heavy traffic may need assessments twice yearly. Early detection of cracks, potholes, and drainage problems prevents expensive repairs. Document findings with photos and notes to track deterioration patterns over time.
What should I include in a commercial pavement maintenance checklist?
A thorough commercial pavement maintenance checklist covers debris removal, crack inspection, pothole identification, sealcoating readiness, drainage assessment, and safety hazard detection. Include seasonal tasks like spring cleaning after winter damage and fall inspections before heavy weather. Document the condition of both asphalt and concrete surfaces separately, as they require different maintenance approaches and treatment cycles.
How do I create a realistic pavement maintenance budget for a multi-year plan?
Start by calculating lifecycle costs: assess current condition, estimate service life remaining, and factor in treatment options (crack sealing, sealcoating, patching, resurfacing). Divide total projected costs across years to smooth budget impact. Allocate 2-3% of property value annually for preventative maintenance. Get quotes from qualified contractors to ground estimates in real costs, then adjust for your property's specific site conditions and traffic volume.
What's the difference between preventative and corrective maintenance in a pavement plan?
Preventative maintenance includes routine inspections, crack filling, sealcoating, and debris removal, actions that slow deterioration and extend pavement life. Corrective maintenance addresses existing damage: patching potholes, repairing localized damage, and resurfacing worn areas. A balanced plan prioritizes preventative treatments to reduce the need for expensive corrective work. Neglecting preventative maintenance often leads to rapid surface deterioration and higher lifecycle costs.